I’ve gotten some questions on how I edit my pictures from a yellowy shade to a more cool toned one. So I thought I would let you know the photo editing apps I use, the filters I like best and the filters I use on pictures like this. So here we go!
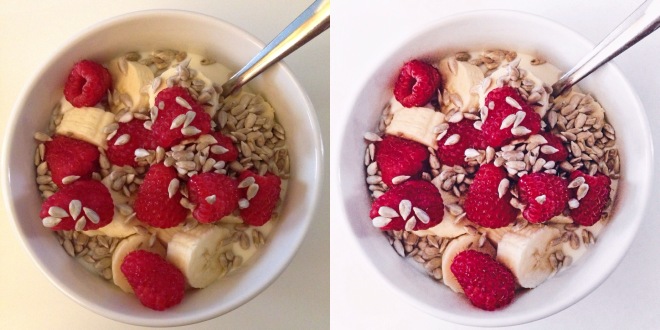
The first app I use is FaceTune, and as you can probably tell, I don’t use it to tune my face. I use it to make sure that the background is completely white before I apply any filter. This app costs £3.99 but honestly there is no other app like this. So I just use the ‘Whitening’ tool (which is normally used for teeth whitening haha) and make sure the white shades are as white as they can be – in this case the table, the bowl and the yogurt (see the left screenshot). You can use the erase tool if you went a little overboard and made something white that you didn’t mean to (see the middle screenshot). The last step in this app is using the ‘Details’ tool. I just use this to accentuate certain things. On this picture, I just made sure that the raspberries stood out more than the rest, adding a bit depth to the picture.


The next app is FREE! YAY! It’s called VSCO. So here you can add whichever filter you’d like. The blue and cool filters that I use are HB1 and A5, I just test and see which one I like the most. I never use the filter fully, I normally go up to +5.0 but since this photo was quite yellow, I went up to +9.0. I added a little bit more exposure and contrast to make the picture brighter. I use clarity to make the colours in the photo stand out more (I never do over +1.0). I add maximum of +2.0 highlight and if the photo is still too yellow, I change the temperature to be a bit cooler (-0.8).


I hope this helped you a little bit if you have some yellow toned photos that you’d rather edit to be cooler toned. Have a great weekend!
Be kind, be humble.
– Helina x
